Archive by Author

Compass Rose

27 Jan

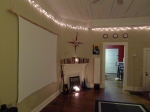
I moved into a new house a few months back and I wanted to do the living room in a travel theme. The hardest part of the room to decorate was the big space over the mantle:

It was a big, open, ugly space and it had this metal circle protruding from the wall that I could not remove. I believe it was a hold over from some wood burning stove or something. For a long time I kept stressing out over what to put in this space. I didn’t have much of a budget, and I was afraid that not putting something travel related would take away from the theme of the room; especially in such a prominent place above the mantle. It was one day that I was thinking “hey, a sun sculpture might look nice” when I realized “sun…rays…arrows…travel…compass rose!”  A compass rose would be perfect! I already make copper roses, and this would simultaneously go with the travel theme and cover the nasty circle. And so I got to work.

For materials, I decided to build the compass rose out of flashing. Flashing’s a (relatively) cheap roll of aluminum that you can pick up at a hardware store. For a pattern I used an octagon. Getting the spacing just right was really tough. I had eight limbs, four main, for minor for all the directions, and so each limb had to be at a 45 degree angle. Once those were cut out, I arranged them on a small block of wood as a base, and put a screw in the center to hold the rose petals down. I then carefully spray painted the main limbs a high gloss ruby red. I thought this would give some nice color to the room. After that dried, I assembled the rose and began bending the petals into shape. Below is a picture time lapse of how it went:

Whiskey Lamp

21 Oct

Lately I’ve been collecting bottles of various types. From time to time my dad will have a glass of whiskey after work and I snagged this bottle when he finally finished it. I saw several bottle lamp designs before, but most of them ran the cord on the outside, like someone just took a lamp top and shoved it on top of a bottle. The effect was very frankensteinish and I didn’t like it very much. I wanted the cord to go up through the bottle so the bottle was the lamp, not just a stand for the light fixture.

The tricky part was that I also wanted the bottle to be filled with liquid. The amber glow would have more of an impact than just a hollow empty bottle with wires in it. The biggest obstacle to this plan was that water and electricity don’t mix. I had to come up with a way to shield the cables from the water, while at the same time keeping the water from leaking out of the bottle.

I have a fish tank here in my apartment and some surgical plastic tubing that goes with it to pump air into the tank. I took a little snip of tubing and found that I could snugly slide the electrical cables into them. This would at as my shield against the water. I got a diamond tipped bit and carefully carved a whole in the bottom of the bottle, inserted the shielded wires, and then plugged the gaps with pvc piping glue. (I initially tried wax and superglue, but this didn’t work well enough to my satisfaction.)

I got a larger piece of surgical tubing and slid the smaller two wires through that at the neck. I then continued to fill gaps and seal the bottle with pvc piping glue. Yet before I sealed it all up, I filled the bottle with distilled water. I chose distilled because it lacks hard minerals. I figured this would aid in the life of the lamp and prevent buildup inside the bottle. I then toyed around with how to get the water to look like whiskey. I settled on 6 drops yellow food coloring, 4 drops red, and 1 drop blue. This helps give the lamp and amber glow. I sealed everything up, plugged it in, and bingo, Whiskey lamp:

Wax color explosion

2 Sep

The other day my girlfriend found this interesting blog showing what someone did with melting wax crayons. That blog was in turn inspired by this seller on Etsy. We decided to give it our own spin. We thought a color wheel would look neat, but that we’d rotate the canvas as we went to create a starburst-like explosion. The center was left with a big void that we eventually decided to fill with a mirror. (Since the theme was visible light, what better than a mirror?) Instead of using a hair dryer, we used the tip of a hot glue gun. This allowed us greater precision in melting the wax and left the piece with an amazing texture that jumps off the canvas at you. Check it out!


Copper rose

8 May

So for mother’s day I wanted to make something special. I love working with copper and I thought it might be cool to make a copper rose. I went out to the hobby store, got some sheet copper and then found a pattern for a paper rose online. I printed out the patter and resized it for my needs. (There was only one petal in it and I needed several of progressively smaller sizes) I then taped the paper cutouts onto the copper and recut around them. When that was taken care of I got a piece of coat hanger wire, cut it to the right length, and then punched small holes in all the copper pieces. I then slid the copper petals, from smallest to largest, up the wire, fastening each petal with super glue. (Oh, and I also bent the very tip of the coat wire slightly so the petals couldn’t slide off. I folded the copper up like a cup to give it the shape of the rose. Lastly I took a pair of pliers and carefully curled the edges of the petal to give it a more organic look. (click to enlarge)

Paintings galore!

13 Apr

Hey everybody, I know it’s been a hell of a long time since I posted anything new, but I am still crafting. Moving homes really puts a dent in everything! For the past few months I got onto a poster/painting kick. Here’s some of what I’ve made! (click to make em larger)


Painting isn’t my normal medium because my hands are not that steady, but I really like how these turned out. As usually, they’re all for sale either here or on my etsy website. 🙂

Icarus

12 Jan

One of my favorite characters from Greek mythology is Icarus. For those of you who don’t know who Icarus was here’s a quick synopsis:

Daedalus fashioned two pairs of wings out of wax and feathers for himself and his son. Before they took off from the island, Daedalus warned his son not to fly too close to the sun, nor too close to the sea. Overcome by the giddiness that flying lent him, Icarus soared through the sky curiously, but in the process he came too close to the sun, which melted the wax. Icarus kept flapping his wings but soon realized that he had no feathers left and that he was only flapping his bare arms. And so, Icarus fell into the sea in the area which bears his name, the Icarian Sea near Icaria, an island southwest of Samos.

There is also a trance song that I absolutely love about Icarus. If I ever go sky diving I will have my ipod on this track and time my jumping out of the plane exactly at the 00:48 mark.

Anyways, with this in mind I wanted to create an Icarus statue that told the story of Icarus. I don’t have the sculpting skills yet to carve a falling figure our of wood or clay, so I bought a sketch mannequin from the craft store. (click to enlarge any of these pics)

I thought about using actual craft feathers to do this project, but then I realize that they would probably look to sloppy and would now flow well if I made the sun out of copper, so I decided to go all copper. The first thing I did was make the sun.

The next, and perhaps hardest part of the project, was creating the wings. I wanted to have curved wooden wings since i thought they would be more elequent than just wooden planks strapped to his back. To do this I took some wooden skewers and boiled them for about an hour, then steamed them, and finally soaked them in a thermas of boiling water for the afternoon, all in an attempt to turn the wood into a noodle so I could easily bend then into a make-shift press and dry them to the new shape.

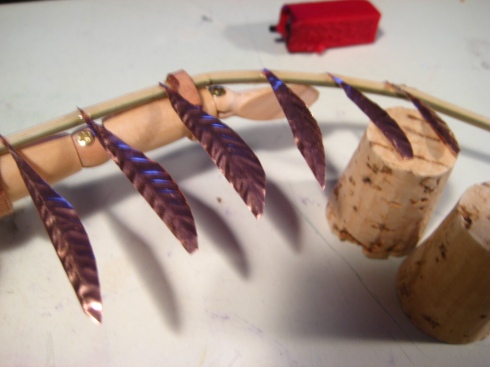
I then started work on the brass feathers themselves. I really wish I could have done long, flowing, full, glorious angel like wings, but the story is that Icarus’ wings fell away and were destroyed, hence why he fell into the sea. So I was forced to make some raggedy wings with only a few sparse feathers. I still think it looks nice though.

Next I came up with the idea of putting wax over the feathers, since the wings were held together by wax. It wouldn’t be too noticeable, but for those who took the time to look, it would be a nice touch. However, I made the mistake of using red sealing wax which ended up looking a lot like blood and totally stole the focus away from the rest of the statue with how gruesome it looked.

Since that looked like crap I carefully picked off all the wax by hand and re-did it in white wax that was more clear and a lot less noticeable.

I then started work on making decorative waves out of brass for the sea.

Finally, the whole thing came together. I really love it. It has the tattered wax wings of Icarus falling from the angry sun into the churning sea below. I’m quite proud of it.

Improvisation when making crafts

10 Jan

A really important part of all my craft projects is improvisation. I have only a basic set of tools and a table in my room as a “workshop.” Almost every project I undertake requires me to improvise a tool to some degree or another. A perfect example is the project I’m currently working on “Icarus and the sun.”

I wanted to make a sun out of some sheet copper I had lying around, but in order to do that I needed to “dish” the copper. When you “dish” a metal, you are hammering it into a bowl or cone like shape. It’s fairly tricky to do since a flat piece of metal doesn’t want to become a dome.  In order to do this I needed a dish into which I could “dish” my metal. I needed to find something that had the angle of dome I wanted that I could hammer the metal into, but where? I had to improvise.

My first thought was to go down to Lowes and get a pipe cap.

Unfortunately the pipe caps at Lowes were all either PCV or threaded. The PVC ones had walls that were way to high. I would have had to saw through the PVC to cut it down to size, and that would have been a real pain. Defeated, I got back in my car to drive to the craft store to pic up some other things. That’s when I took a sip of my soda and it hit me!

I looked at the bottom of my soda can and noticed it was a dome, however a soda can’s dome was too flimsy and small to suit my needs. What else holds liquid and has a dome at the bottom? A wine bottle! I had plenty of those, and the thick glass is much stronger than flimsy aluminum. (I wasn’t going to be pounding since I was working with thin copper, so glass would work.

Here was an improvised dish, and sure enough it worked!

Improvising tools is half the fun of making crafts.

Wine Ship

26 Dec

A while back I got the idea of making a ship from a wine bottle.  If you cut a wine bottle down length wise it looks a bit like the hull of a ship.  The biggest problem I ran into was trying to cut a wine bottle lengthwise.

I tried everything. I tried sawing it, that didn’t work. I tried scoring it with a glass cutter and then pouring boiling water over the score marks followed by ice water; that cracked it, but often in unpredictable ways. I think I went through about five bottles experimenting with this. I had decided a while ago that this is what I wanted to make my dad for xmas, and when Dec. 24 rolled around I was in a bit of a panic.

I realized that I didn’t need to crack the bottle clean in half. Trying to do that with the super thick neck and elaborate base of many bottles made cutting it lengthwise nearly impossible. Instead, I figured I only needed to remove a portion and could leave the neck as the bow of the ship, and the bottom as the aft cabin. I took a bottle, carefully smashed a section on the shoulder, and then proceeded to delicately snap off pieces with a pair of pliers. (click pics to enlarge)

I didn’t want anyone being able to see into the ship, so I decided to paint the inside with a tapestry wine color paint. After I did this I realized I had a problem. The bottle I was using held white wine and was see through. I needed to use a dark bottle that held red wine. The green glass tinted the paint and made it look like a bottle full of chocolate milk.

(You can somewhat see the purple there, but without the light shinning right on it, the whole thing looked an ugly brown….so I scraped it all out.

Then I repainted it in a black paint and it looked much better.

The next big problem were the sharp edges around the bottle where I broke the glass. I didn’t have the tools or the time to file everything down to a smooth edge, so I came up with the idea to incorporate the wooden deck onto the boat in such a way that it covered the edges. I first built the base foundation for the deck which extended ever so slightly above the top of the glass so as to provide a level plane for the deck to sit upon.

After staining the wood, I applied the deck, glued it down, and then carefully trimmed around the edges to give it a much cleaner look.

Lastly came the mast and rigging and presto!

Rose under glass

3 Dec

A few days ago we had some fresh roses in the house and they gave me some “beauty and the beast” style inspiration for an accent lamp.  I had a glass vase and some mirrors left over from a lava lamp project, so I decided why not invert the vase and put the rose in it. I found a nice chunk of quartz to hold up the rose at the base. The best part is that it glows under the light. With only about 20 minutes of fiddling, I had this awesome lamp! (Click the pics to make them larger and see more detail)

Chopsticks

29 Nov

In an evening of sheer boredom, I decided to make some chopsticks: